|
thinBASIC TBGL Website
by Petr Schreiber |
|||||
| Home | Tutorials | Articles | Tools | Links | About |
>>-
' -- Prepare post process texture buffer WHILE TBGL_ISWINDOW( hWnd ) ' * First pass * TBGL_CLEARFRAME ' -- Setup scene for render to texture ' -- Draw it ' -- Pass to texture ' * Second pass * TBGL_CLEARFRAME ' -- Setup scene normally ' -- Draw it ' -- Draw post process layer TBGL_DRAWFRAME ' -- Here some code to exit loop :) WEND - <<
-
So first we need to prepare texture buffer, this I would do like in following procedure:
>>-
SUB PostProcess_Init( textureSlot AS LONG, textureSize AS LONG) GLOBAL PostProcess_TextureID AS LONG = textureSlot GLOBAL PostProcess_TextureSIZE AS LONG = textureSize TBGL_USETEXTURING %TRUE TBGL_BINDTEXTURE PostProcess_TextureID DIM TexStr AS STRING = REPEAT$( textureSize * textureSize * 3, $SPC ) TBGL_MAKETEXTURE (TexStr, %TBGL_DATA_RGB, _ textureSize, textureSize, textureSlot, _ %TBGL_TEX_LINEAR ) END SUB - <<
-
Code just reserves texture slot for post process effects and setups texture filtering to bilinear. Prepairing new texture slot is done as filling it with dummy texture for the moment.
To create texture we just use string of size textureSize * textureSize * 3, passed to TBGL_MakeTexture function. That "* 3" is there simply because we need space for 3 color channels at least - R,G and B.
Bigger the texture size will be, nicer the final effect will be.
Here comes quite easy part, capturing the screen to texture. As we will render scene twice ( once just to texture and then at real resolution ) we need to set temporary raster for the first pass.
This means to force rasterizer to render to grid sized as texture.
I will encapsulate this in following procedure:
>>-
SUB PostProcess_PrepareViewPort() TBGL_VIEWPORT(0, 0, _ PostProcess_TextureSIZE, PostProcess_TextureSIZE, _ %TBGL_PARAM_PIXELS) END SUB - <<
-
Although TBGL_Viewport operates with window proporions by default, by adding equate we can override this behaviour to use pixels. Which is what we want now, because we need to fit the render in particular texture size.
Now its time to render scene and capture it to image:
>>-
SUB PostProcess_GetTexture() TBGL_RENDERTOTEXTURE(PostProcess_TextureID, 0, 0, _ PostProcess_TextureSIZE , PostProcess_TextureSIZE) END SUB - <<
-
TBGL_RenderToTexture replaces our dummy texture with true imprint of current screen.
In second pass we will render scene classic way.
Just before swapping the buffers we will apply our post process
Good news - this is surprisingly the most easy part! Just few quads with texture, slightly moved off axis:
>>-
SUB PostProcess_Render_glow( glowOffset AS LONG, nPass AS LONG, _ toneR AS BYTE, toneG AS BYTE, toneB AS BYTE) LOCAL i AS LONG LOCAL cx, cy AS LONG LOCAL fxStep AS SINGLE = 360/nPass LOCAL angle, xShift, yShift AS SINGLE TBGL_GETWINDOWCLIENT hWnd, cx, cy TBGL_RENDERMATRIX2D TBGL_BINDTEXTURE PostProcess_TextureID TBGL_USELIGHTING %FALSE TBGL_USEBLEND %TRUE TBGL_USEDEPTHMASK %FALSE TBGL_COLOR toneR,toneG,toneB FOR i = 1 TO 360 STEP fxStep angle = i * 0.0174532925199433 xShift = SIN(angle)*glowOffset yShift = COS(angle)*glowOffset TBGL_BEGINPOLY %GL_QUADS TBGL_TEXCOORD2D 0,0 : TBGL_VERTEX xShift , yShift TBGL_TEXCOORD2D 0,1 : TBGL_VERTEX xShift , cy+yShift TBGL_TEXCOORD2D 1,1 : TBGL_VERTEX cx+xShift, cy+yShift TBGL_TEXCOORD2D 1,0 : TBGL_VERTEX cx+xShift , yShift TBGL_ENDPOLY NEXT TBGL_COLORALPHA 32,32,32,64 TBGL_USEBLEND %FALSE TBGL_USEDEPTHMASK %TRUE TBGL_USELIGHTING %TRUE END SUB - <<
-
... and it did not hurt at all! Enabled blending assures we will mix information in current framebuffer with new postprocess layers containing just still image of the scene.
Little tip for tuning - you could cache the post process quad using display list to get really brutal performance.
You can now go to the footer of article and download source, but what about continuing reading?
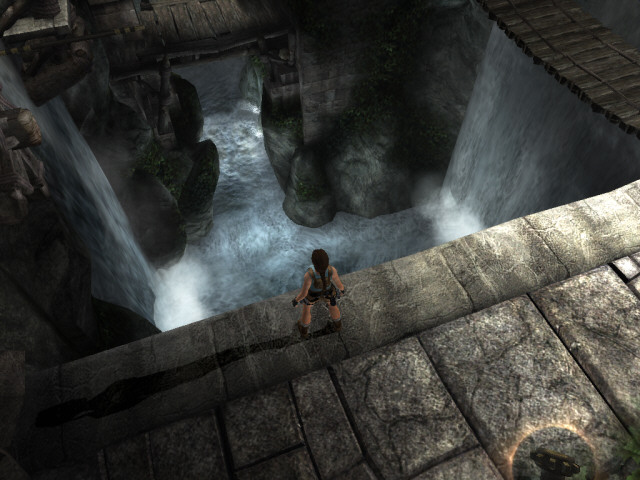
Part Two: Muddy waters

click to enlarge
If you managed to get on top of waterfall in the TR demo and go few steps back ( please see picture ), you can watch nice wild water.
It looks quite real, and even better - this effect is piece of cake using model buffers.
What I like about how the effect is done is fact that it is not classic pixel shader surface, but quite wild river stream, almost not transparent.
This sounds like recipe for effect fiasco, but believe me - it looks good!
There are some particles to simulate water splashes, but I will not use it for our sample as it is quite easy to add anytime later.
Ok, everything has its dark side, and this has one luckily not so fatal - you will do most of the work in 3D editor.
It is all about proper UV mapping.
So just prepare few tesselated planes ( each representing one stream of water in the big river ), texture them with some nice image and make the little bit bumped like there is something below them ( big rock, dead velociraptor, whatever ... ).
Now you just need to load model, and animate it just as simply as this:
>>-
SUB AnimateWater( Model AS LONG, Speed AS SINGLE ) LOCAL Vertices AS LONG = TBGL_M15GETMODELVERTEXCOUNT( model ) LOCAL i AS LONG LOCAL u,v AS NUMBER ' -- Just adding number to one coordinate FOR i = 1 TO Vertices v = TBGL_M15GETVERTEXTEXY( model, i) v += Speed / FrameRate TBGL_M15SETVERTEXTEXY( model, i, v) NEXT END SUB - <<
-
Easy... Maybe it would be faster to keep vertexcount in global variable, but determining it each time is not so big performance hit.
Now lets jump to last thing - enemy marking.
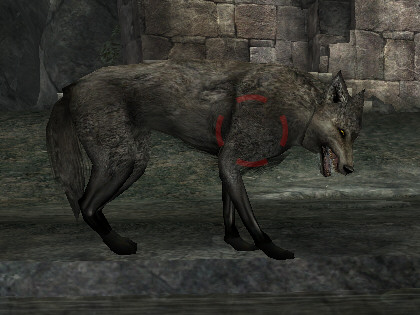
Part Three: Drawing enemy lock

click to enlarge
Hope you have played the Tomb Raider demo as this is little bit tricky to explain :)
When some enemy appears there, you can lock him for gun fight inside red marker. It is simple bit map, which is placed over the model of evil beast ( you must forget that those poor animals are nice, soft, furry wolves, trying to just get food for their family ).
So where is the trick now? In unprojecting 3D coordinates to 2D pixels.
Don't worry, it is quite easy in TBGL
We just need to check for visibility and then place textured quad or rotating triangles ... in 2D mode over screen:
>>-
' ... TBGL_RENDERMATRIX3D ' -- Render scene ' ... ' -- Only if something is selected ... IF ObjectMarked THEN ' -- Here we check if object is not blocked by other ' -- as reference point is inside Object ( never visible ) ' -- we must move out of the radius IF TBGL_ISPOINTVISIBLE (myObject(ObjectMarked).x, _ myObject(ObjectMarked).y, _ myObject(ObjectMarked).z+1.1) THEN TBGL_COLOR 255, 0, 0 ' -- Unproject the 3D position to 2D is easy TBGL_POS3DTOPOS2D myObject(ObjectMarked).x, _ myObject(ObjectMarked).y, _ myObject(ObjectMarked).z, pixelX, pixelY ' -- We will render as in 2D ( pixels ) TBGL_RENDERMATRIX2D ' -- No depth to avoid "Z-fight" TBGL_USEDEPTHMASK %FALSE ' -- No light for the red arrows TBGL_USELIGHTING %FALSE ' -- This draws 3 triangles - our basic marker TBGL_PUSHMATRIX TBGL_TRANSLATE pixelX, pixelY,0 ' -- Draw billboard/ geometry here ... using pixels as units TBGL_ROTATE GETTICKCOUNT/10,0,0,1 FOR i = 1 TO 3 TBGL_ROTATE 120,0,0,1 TBGL_BEGINPOLY %GL_TRIANGLES TBGL_VERTEX -40,10 TBGL_VERTEX -20,0 TBGL_VERTEX -40,-10 TBGL_ENDPOLY NEXT TBGL_POPMATRIX ' -- Back the states we put TBGL_USEDEPTHMASK %TRUE TBGL_USELIGHTING %TRUE END IF END IF ' ... - <<
-
Again, this is nothing difficult. Hope you'll find some use for it in your next game!
Thats all!
Yes, really! If you want you can download resource below, which demonstrates each technique in one script to keep it clear and clean.
If you expect jumping Ms. Lara in those scripts, then I must disappoint you. They are just showing general scenes to not complicate reading of source with some "difficult" parts.
I would be even happier if you would equip your new game with features mentioned in this article.
Hope you liked this little fake excursion to developers kitchen, and maybe we will meet in other article in future!
* EDIT: Shaders can now be used in thinBASIC. At the time of writing of this article it was really not ( officially ) possible, but then I asked myself why not port such a feature to thinBASIC :)
All images in this article were captured from demoversion of Tomb Raider : Anniversary, developed by Crystal Dynamics and published by Edios Interactive
GamingFX
Tomb Raider: Anniversary
 As you probably noticed, remake of old good Tomb Raider game was released in June 2007.
If you played both games or at least the demos, you can see there is lot of extra eye candy in new version of the game. Do you want your scripts to look cutting edge too? Sure!
Now please let me go through some nice techniques presented in TRA and explain how to achieve it in TBGL.
Keep in mind I have no sources of the game, so my implementation will vary from the original ( not speaking of Tomb Raider is running DirectX 9 and we will use TBGL based on ancient version of OpenGL :) )
Things to focus to
Regarding graphic techniques, I chose quite sundry ones.
First I will show you the most evident and visually stunning effect - the glow. Then I will guess how developers implemented wild water near waterfall and finally I will present really basic stuff used to mark enemies.
For your comfort I will explain all stuff on scenes from TRA demoversion, which you can get for free anywhere on the net. This way you can compare results we achieved using TBGL and original.
When you will go through the text you should get the idea, and at the end you can download sources demonstrating each technique.
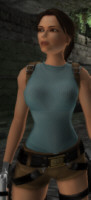
Part One: The mighty glow
As I said, this effect is the nicest thing you will notice immediately. In TR it is used in cutscenes and when Lara swims under water surface or is nearby some bright light source.
This technique somehow makes image look softer, bit blury and really hi-tech :).
If you don't get the idea from my confusing explanation, please click on the screenshot placed somewhere nearby.
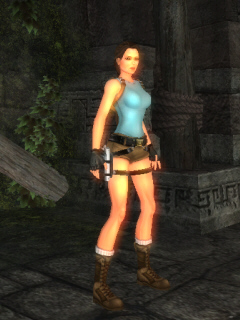
click to enlarge
At time of writing this article there is no easy way to make it via pixel shader*, but don't worry, this time TBGL functions were just enough.
We will do it by technique pioneered in tB by code port thanks to Kent Sarikaya. It is rendering to texture.
Once we capture screen to image, we will render it over scene multiple times, with few pixels shift in radial directions. Please do not confuse this with radial blur - for this we would not shift, but zoom the image.
Capturing the screen to texture is surprisingly easy, we just need to setup texture buffer and copy image from framebuffer to it. To not run into problems with older hardware we will use power of two size, but if you target next gen hardware with OpenGL 2.0, you can use any size.
To make possible to follow me, lets start with this pseudo code, which shows how it works:
| © Petr Schreiber 2012 |